Search This Blog

Tuesday, April 30, 2013

Milk Can Makeover

My mother-in-law recently celebrated her 65th birthday.  No, I'm not in trouble for telling you all.  She is proud of making it to retirement as she should be!

One thing I have in common with her is the fact that we both love shabby chic.  We love to take old things and give them new life.  So, for her birthday I decided to take an old milk can that was sitting around our house and give it a makeover. I think it turned out so cute and she loved it.

What do you think?


Here's what it originally looked like.  Not too pretty!


It's had a rough life.  As you can see it's pretty dented and the top had a little rust on it.  I saw the potential though.

I started by giving it a good sanding, especially the top to remove the rust.  I then painted the top and bottom with black spray paint.


I then taped off the top and bottom and sprayed the middle a pretty teal color.


When that was done I used an antiquing glaze over the teal.  I just painted it on with a sponge brush and then wiped over it with a paper towel.  Just play with it until you get the look you want.

Before Antiquing Glaze


After Antiquing Glaze

I used my Cricut to cut the rooster out of white vinyl and attached it to the milk can.  I also added the ribbon to give it a little texture.


Super Cute!  I love that something old can be made so cute with just a little work.  Happy Birthday Mom!  Hope you had a memorable one!


Linked up with:
Lil\'Luna       

Friday, April 19, 2013

Family Camp in Review


 Last summer our family attended Aspen Grove Family Camp in Provo Canyon located in Utah.  We had so much fun that I thought I would share our experience with you.

What is family camp?  It's summer camp for the entire family.  There are several throughout the country so if you can't make it to Utah check out which ones are in your area.

Honestly this was one of my very favorite vacations EVER!  Why?  Because I, yes me the mom, actually got a vacation!  That's right, I got to relax...on vacation!  You moms know what I'm talking about.  Vacations always seem like so much fun until you have to do all the packing, the prep work, plan all the activities to keep the kids happy, more packing...you get the idea!  Sometimes it's not much of a vacation.

At family camp, everything is already planned for you.  At Aspen Grove, the children are divided into age groups with young adults as group leaders.  They even had daycare for the baby!  Each day after breakfast the kids head off with their group to participate in tons of fun kids activities.  They go swimming, hiking, do arts and crafts, you know all that fun summer camp type of stuff.  You meet up with them for lunch and then they head off again.  In the late afternoon there were family activities such as ropes course, water games, and such to do as a family and then after dinner there were camp fire activities or shows.

As you can see my kids LOVED their group leaders!!


For the adults there were all sorts of workshops and activities.  There were spiritual seminars, as this camp is run by the BYU Alumni Association, as well as parenting and marriage workshops.  There were also activities such as pottery, crafts, pen turning, ropes course, and a shooting range.

Here's Todd enjoying his pen turning class.  He looks pretty cute in those safety goggles!


The lodging was really nice.  Aspen Grove has a few choices as far as lodging goes.  They have rustic cabins with a bath house.  I didn't actually go and check those out but judging by the rest of the camp I bet they were nice and clean.  We stayed in the Beckham Lodge.  It was like a little apartment but with no kitchen.  The lodge did have a shared kitchen on each floor so we had access to a refrigerator and oven.  So take lots of snacks and drinks!  ( I didn't and was sorry when we got there!!)  Our 'room' had a master bedroom that led out to a shared porch with an incredible view of the mountains, a room with bunk beds for the kids, a living room with pull out couch and a bathroom.  The best part....NO TV!  That's right, no TV at summer camp!!  There was also a laundry room on each floor of the lodge.

The other lodging option is a family lodge.  You have to have a group of at least 26 to book a family lodge.

Here are the kids on their bunk bed.  The middle one is showing the ceramic skull she made at arts and crafts.


At night after all the kids were put to bed the parents would hang out in the lounge playing games and chatting.  (Bring you baby monitors! It comes in really handy!)  The kids were so tired from all their fun activities they went right to sleep.  And when I say right to sleep I mean right to sleep!  They were so exhausted they were asleep before their heads hit the pillow!  Another bonus to camp!

This is our little group staying up late playing some games.


Now, lets talk about food!  I DIDN'T HAVE TO COOK ANYTHING FOR A WEEK!!  Ahhh, I love this part about camp!  We had 3 meals a day and I didn't have to cook or clean ANY of it!  The food at Aspen Grove is cafeteria style but it was delicious!  They had a good variety of foods that were well prepared.  And for an added bonus...they had a kids bar!  It was full of baby food and all that food kids love to eat.  They had chicken nuggets, mac n cheese, PB&J, you get the idea.  So if the kids didn't like what they were serving on the adult bar they could just go over to the kids bar and find something there.  We ate well!  I would recommend taking lots of snacks and something for the kids to munch at night.  There were no food options after the dinner meal and my kids are used to having some sort of bedtime snack.  Let's face it, so am I!

Wednesday at Aspen Grove is hiking day!  The true hikers go and hike Mt. Timpanogas.  It's a grueling 14 miles round trip.  The camp packs you a lunch and most are back in time for dinner.  If not, they have 'to go' boxes for dinner.  All of the kids groups go on a hike that day.  The kids loved it and felt a sense of accomplishment when they got back.


Todd and our oldest son were brave enough to hike Mt. Timpanogas!  I think they had a pretty good time but they were pretty exhausted by the time they got back!


The Summit!

Did I forget anything?

The entire camp staff, from the director all the way down to the cleaning lady who came to clean up after our daughter got sick in her bed, were terrific!  They were all wonderful and all seemed happy to be there doing what they were doing!

We hope to go back sometime soon.  The kids still ask about it and of course, so do I.  Who can resist a vacation where I don't have to cook, clean, or plan any activities?!?  Aspen Grove....here we come!


Tuesday, April 16, 2013

Orange Creamsicle Cupcakes

I don't know about you but we are REALLY looking forward to summer coming to Utah! One of my favorite memories of summer is Orange Creamsicles. I mean, what's better than a popsicle with ice cream in the middle?! My mom would buy them each summer and boy were we happy campers. 

 Well, it's not quite warm enough for popsicles here but I came up with a really yummy and simple way to make Orange Creamsicle Cupcakes. They taste as yummy as they look!
 

Here's what you need:

White cake mix
3 eggs
1 C. water
1/3 C. oil
1 1/2 tsp. orange extract
zest from 1 orange

Mix all ingredients together and bake cupcakes.  Let cool completely.

For the frosting:

8 oz cream cheese
1 stick butter
1 tsp. vanilla
3 C. powdered sugar
8 oz. whipped cream

Cream the cream cheese and butter together.  Add vanilla and powdered sugar.  Gently fold in the whipped cream.

Now the fun part.  Cut off the top of each cupcake


 Use a cupcake corer and core each cupcake


Place your frosting in a piping bag, fill the center hole in the cupcake


Pipe more frosting over the rest of the cupcake


Place the top back on the cupcake


There you have it!  Delicious Orange Creamsicle Cupcakes.  The frosting is addictive so be careful!


These cupcakes are kid approved! 


Lil\'Luna

Friday, April 12, 2013

Homemade Egg Rolls with Sweet and Sour Sauce

One of my favorite Chinese foods is egg rolls.  They are so yummy!  I just can't eat Chinese food with out a couple egg rolls.  A few years ago my favorite Chinese restaurant stopped making their own and started serving re-heated egg rolls.  I couldn't believe it!  I was so upset I decided I was going to figure out how to make my own.  I've been making my own ever since.

They are so easy to make!  Really, they are!  I thought I would share my recipe with you so you could enjoy them too.


Here's what you need:  For Egg Rolls (makes about 15 depending on how full you fill them)

1 lbs ground pork
1 carrot, grated
4 green onions, sliced
1 small cabbage, shredded
2 tsp. ground ginger
3 Tbs. Soy sauce
1 pkg. egg roll wrappers
oil for frying


Here's what you need:  For Sweet and Sour Sauce

1/2 C. sugar
1/3 C. vinegar
2/3 C. water
1 1/2 T. corn starch
4 T. catsup


In a large skillet brown the ground pork.  Add the ginger and soy sauce and stir.  Then add the carrot, green onions, and cabbage.  Cook until veggies are tender. Turn off heat.


Here's what your filling should look like.

Now, follow the directions on the egg rolls package for forming the rolls.  Heat your oil in a fry pan while you form the rolls.


Fry the egg rolls in the oil until golden brown.


Don't they look so yummy!

Add all the sauce ingredients to a sauce pan and cook on medium heat until it's thick and bubbly.  Serve with the egg rolls.

That's it, simple right?!


Have fun and let me know how yours turn out!!

Lil\'Luna

Tuesday, April 9, 2013

Jana's Breadsticks

Jana's Breadsticks


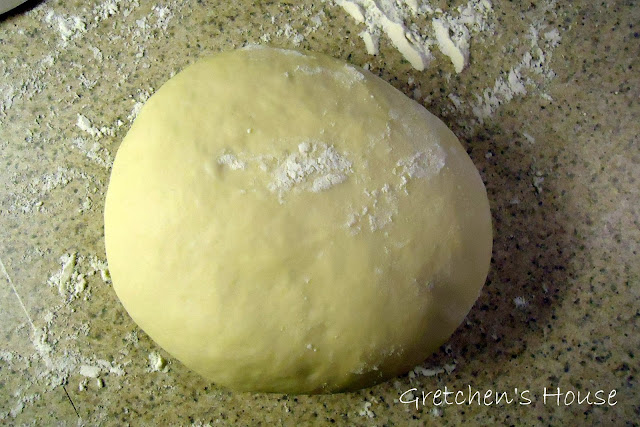
I just realized I promised to post a really yummy and easy breadsticks recipe and I never did!  Silly me!!  I hope they were worth the wait.  Actually, I know they are!  My family loves these because homemade bread just tastes so good and these are quick and easy enough that I actually will make them.  (unlike most of the bread recipes I have!)


I call these Jana's Breadsticks because my best friend Jana gave me this recipe years ago and every time I make them my kids will say,  "are you making Jana's breadsticks?".  So now we just call them her breadsticks!  Thanks Jana!!


Here's the recipe for these yummies!


Jana’s Breadsticks

1 Tbs. yeast                               ½ tsp. salt                     Garlic Salt
1 ½ C. warm water                  3 C. flour                       Parmesan Cheese
2 Tbs. sugar                            6 Tbs. butter

Preheat oven to 375’F.  Mix yeast, water, and sugar.  Let sit for 5 minutes.  Add salt and flour.  Knead.  Let rest for 10 minutes.  Melt butter and pour onto a cookie sheet.  Spread dough out on pan.  Srpinkel with garlic salt and Parmesan cheese.  Score into strips with a pizza cutter.  Let rise for 15 minutes.  Bake for 18 – 20 minutes.
                                                                   Gretchenshouse.blogspot.com 


I always score the dough before I let it rise and bake.  Then the breadsticks just pull apart after they are cooked.


These breadsticks are fantastic with homemade soups and pastas.  You could pair them with my Corn and Krab Chowder!


Mmmmmmm!  So so good!  Worth the wait?  I hope so!
Lil\'Luna


Monday, April 8, 2013

Inspiration Block


My elementary school art teacher, Mrs. Wolf, taught me a valuable lesson that I'm still using today!  "Work with your mistakes!", she would say to us.  You see, there was never starting over in her class.  You got only one sheet a paper to work with so if you 'messed up' that was too bad.  You worked with it!

Well, we recently took a trip to Arches National Park with our kids.  It was BEAUTIFUL and I took tons of pictures.  Of course a lot of them didn't turn out but I'm not a professional photographer so I expected that.

While at Double Arch I took some photos of my son standing in one of the arches.  It was back lit because we were there in the late afternoon and while taking the photo's I thought, "why am I taking these?  None of them are going to turn out".  I kept snapping photos of course.  That's the joy of digital photography, right?

Here's what the photos looked like. What am I going to do with that, right?


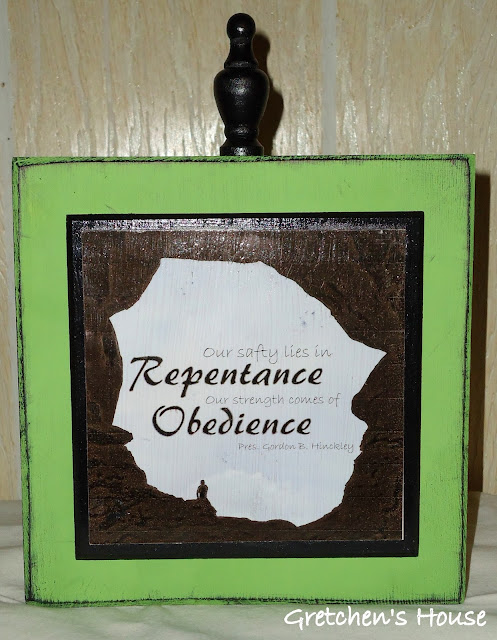
Well, while looking through our vacation photos an idea popped into me head.  Why not add a quote in the big white area and act like I took the photo that way on purpose?  Work with my mistake!!

So that's what I did.  Now my son has a really cool 'Inspiration Block' to put in his room and a fun memory of climbing Double Arch on our vacation!

All I did was import the picture into Picasa, add the text, and print it out.  Use whatever quote you want and whatever font you like.  Picasa is super easy to use so just play around until you find what you like.


Here are the wood pieces I used.  I got them at a local hardware store.  Just paint the pieces of wood.  I also distressed the edges with an ink pad.  Mod Podge the photo on the block and then glue all the pieces together.  It's that easy!


Here's the end product!  Can you find my son in the photo? 


So the next time you make a mistake just remember my art teachers words, "Work with your mistakes" and see what you come up with!!